Basic Stamping
The obvious stamping technique with distress inks is to just ink them up and stamp! What's nice about this is that a distress ink smudged on to form a background, and a stamped ink will be two different colours.

Watercolour Stamping
This is a fun one, you can create gorgeous watercolour effects using these inks! It's very simple, ink up your stamp, I've used Dusty Concord, and then squirt it with your water-squirter. You want it looking something like this;

I've stamped on that other key there without water for a comparison. Once your squirted stamp is on, it'll look something like the one on the left here;


Lazy Watercolouring With Distress Inks
I love this technique, so simple, yet so effective. To begin with, ink up your stamp with your chosen distress ink and stamp it onto your card.

Next, grab yourself a wet paintbrush and use it to drag the colours in to watercolour certain parts of your image.
Isn't that lovely? Here's what I did with a favourite wooden stamp of mine, my gorgeous little Forever Friends bear.

Stamping and Embossing with Distress Inks
Something else which is special about distress inks is that they stay wet longer than a normal inkpad. So even though they're not a pigment ink, you can still use them for stamping and embossing!
For basic stamping and embossing, ink up your chosen stamp with distress ink and stamp it onto your card. Using a clear embossing powder, cover the design and tap the excess off. Heat up your design with a heat tool, and the distress ink will show through!

(That's Vintage Photo)
And here is that technique on a card;

There's Umbrella Man again. He's had the wording urban stamp stamped all over him in black Distress Ink, then embossed with clear powder. The speckles were done by dabbing a bit of black ink onto the mat, then picking it up and flicking it with a wet paintbrush.
Distressed Embossing
The other really cool thing you can do is distressed embossing! Start off like normal, ink up your stamp, stamp it on and sprinkle on your powder. Here I'm using a gold Papermania embossing powder and the Aged Mahogany Distress Ink.

Now, tap off your excess powder, but really give it a good tap!

You want it to look something like this, with a lot of the powder flicked off and only a little still holding to the ink.

Next, heat it up! And you get a beautiful, half-embossed distressed effect.

Love that finish! I had a bit of a play with it afterwards too, and came up with this;

(It's just some Vintage Photo and a bit of water.)
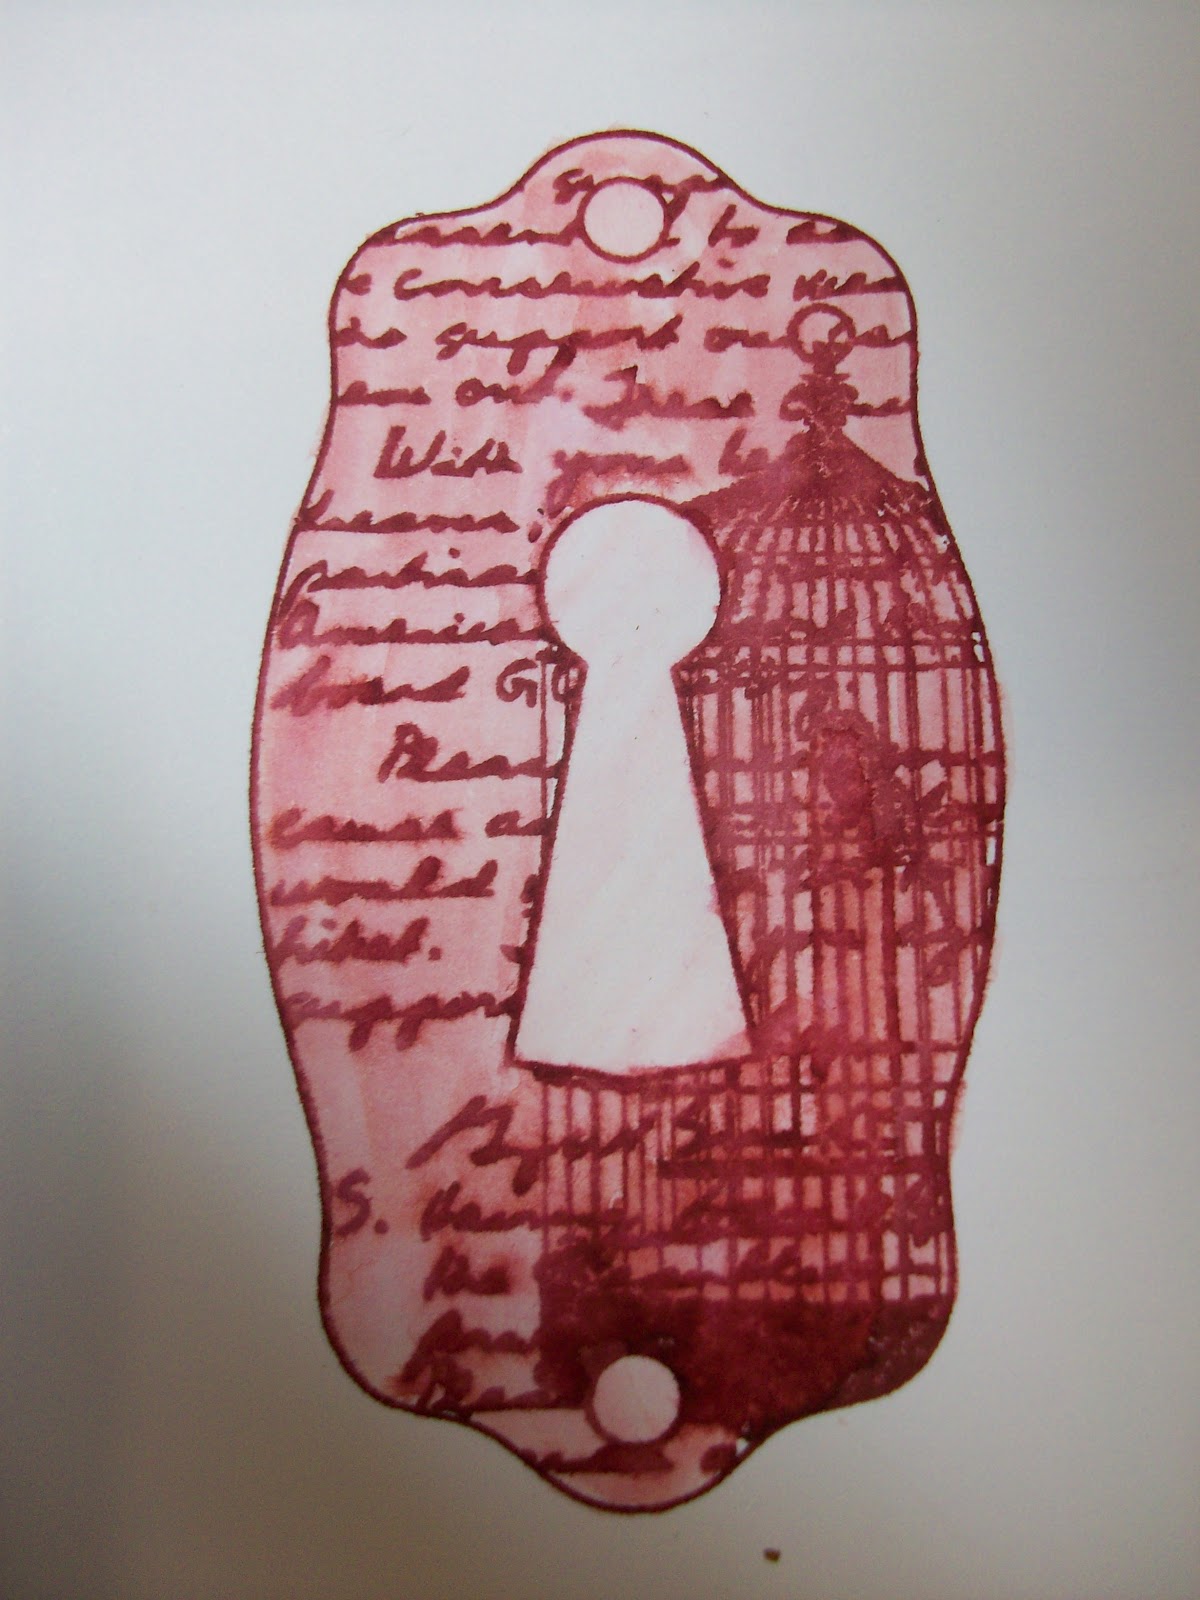
Anita's Clear Gloss & Distress Inks
Now this is just a fabulous effect! And so simple to achieve. You can already get two colours from one pad of distress ink using the basic stamping technique, this is how you get a third!
Adding the gloss to your stamped image is just like colouring with a pen. The gloss has a really fine nib, and is very easy to control.

I've just covered the main part of the image, leaving the keyhole itself free. Once it's dry, this is the effect you get;

Isn't that gorgeous! I love how it changes the colour of the background and darkens up the ink.
And this is what else you can do with gloss;

(Recognise that one? The gloss is used on the heart.)


And just to show that Distress Inks don't have to be Vintage, they can be Girly!

No comments:
Post a Comment
Please feel free to leave a comment!